Navigation überspringen Sitemap anzeigen
Hofbauer Maschinenbau GmbH - Logo

Hofbauer Maschinenbau

Open Source

Bolted Connection

On Github: Examble Bolted Connection
In this Example we will do a simple bolted connection.
First we need to create the geometry.
#!cubit
reset
create brick x 40 y 20 z 5
volume 1 copy move x 20 z -5.001
create cylinder height 11 radius 4
move volume 3 x 10 z -2.5 include_merged
create cylinder height 4 radius 6
move volume 4 x 10 z 4.501 include_merged
create cylinder height 4 radius 6
move volume 5 x 10 z -9.502 include_merged
subtract volume 4 from volume 3 keep_tool
subtract volume 5 from volume 3 keep_tool
create cylinder height 20 radius 4.25
move volume 6 x 10 z -2.5 include_merged
subtract volume 6 from volume 1 2
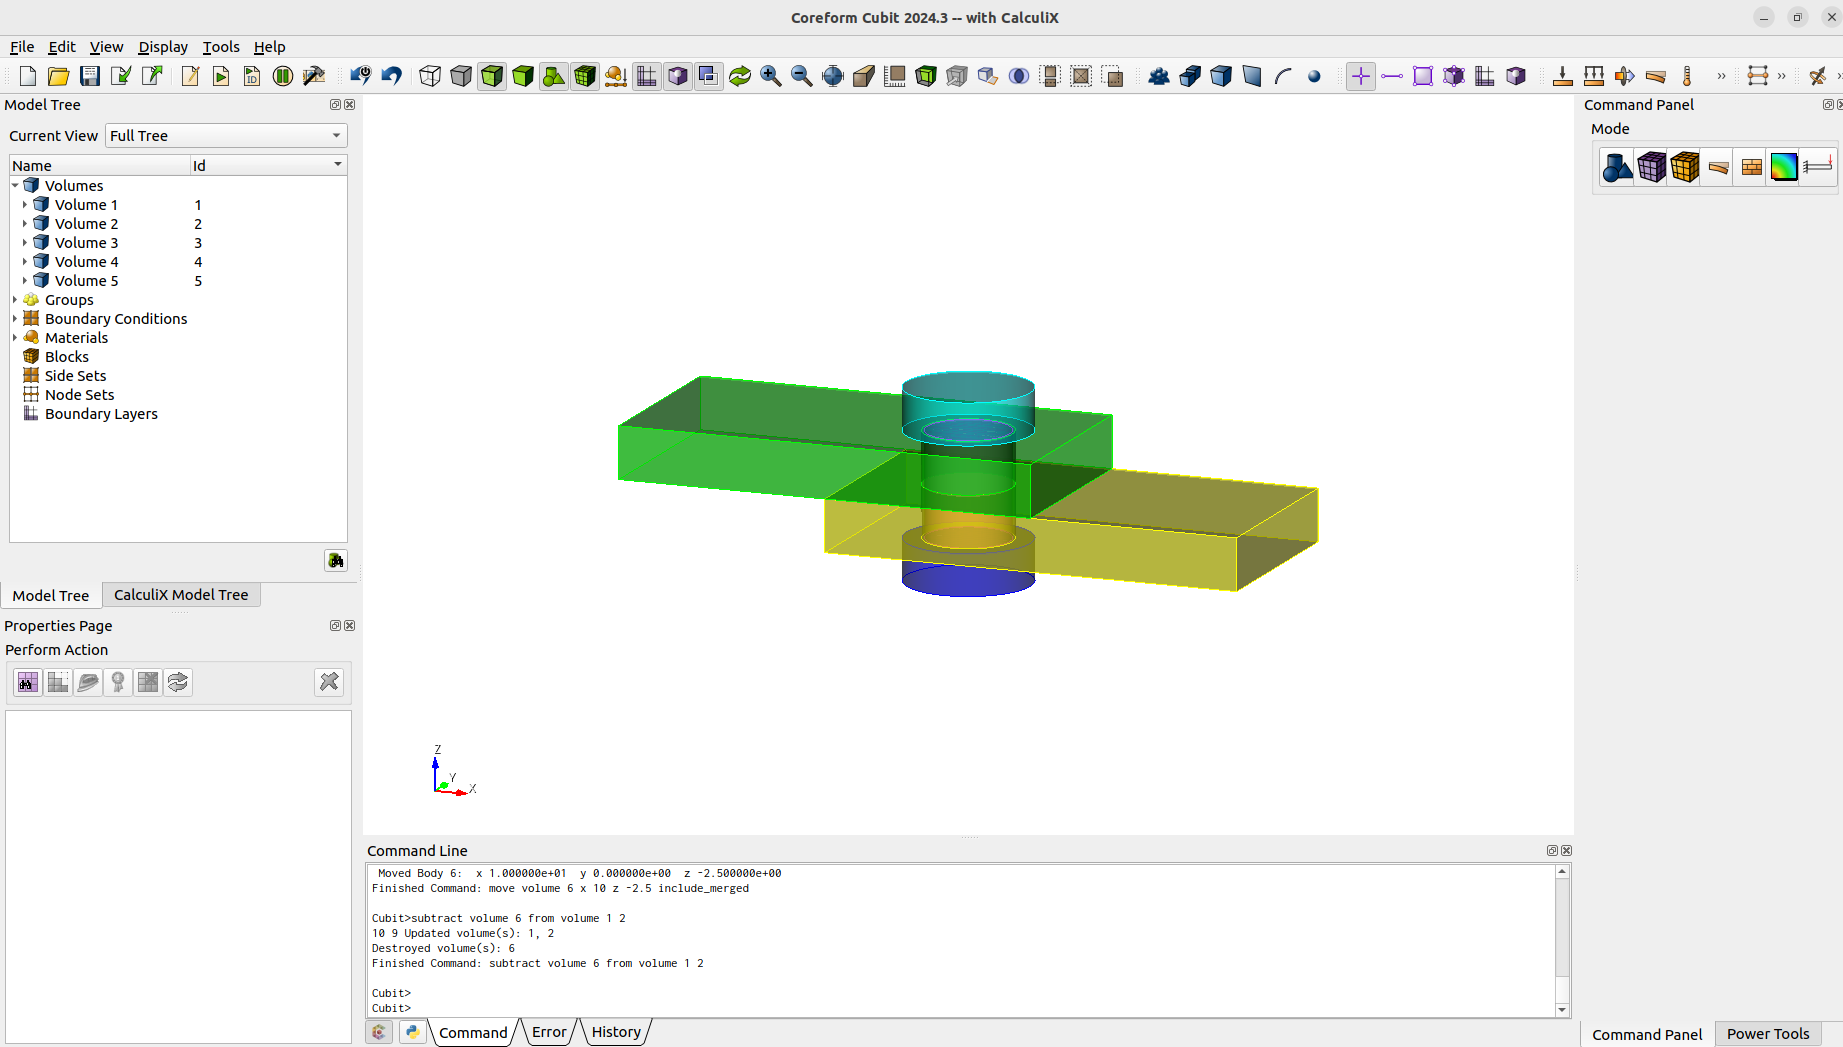
After the geometry creation we can already imprint, merge and mesh.
imprint vol all
merge vol all
mesh vol all
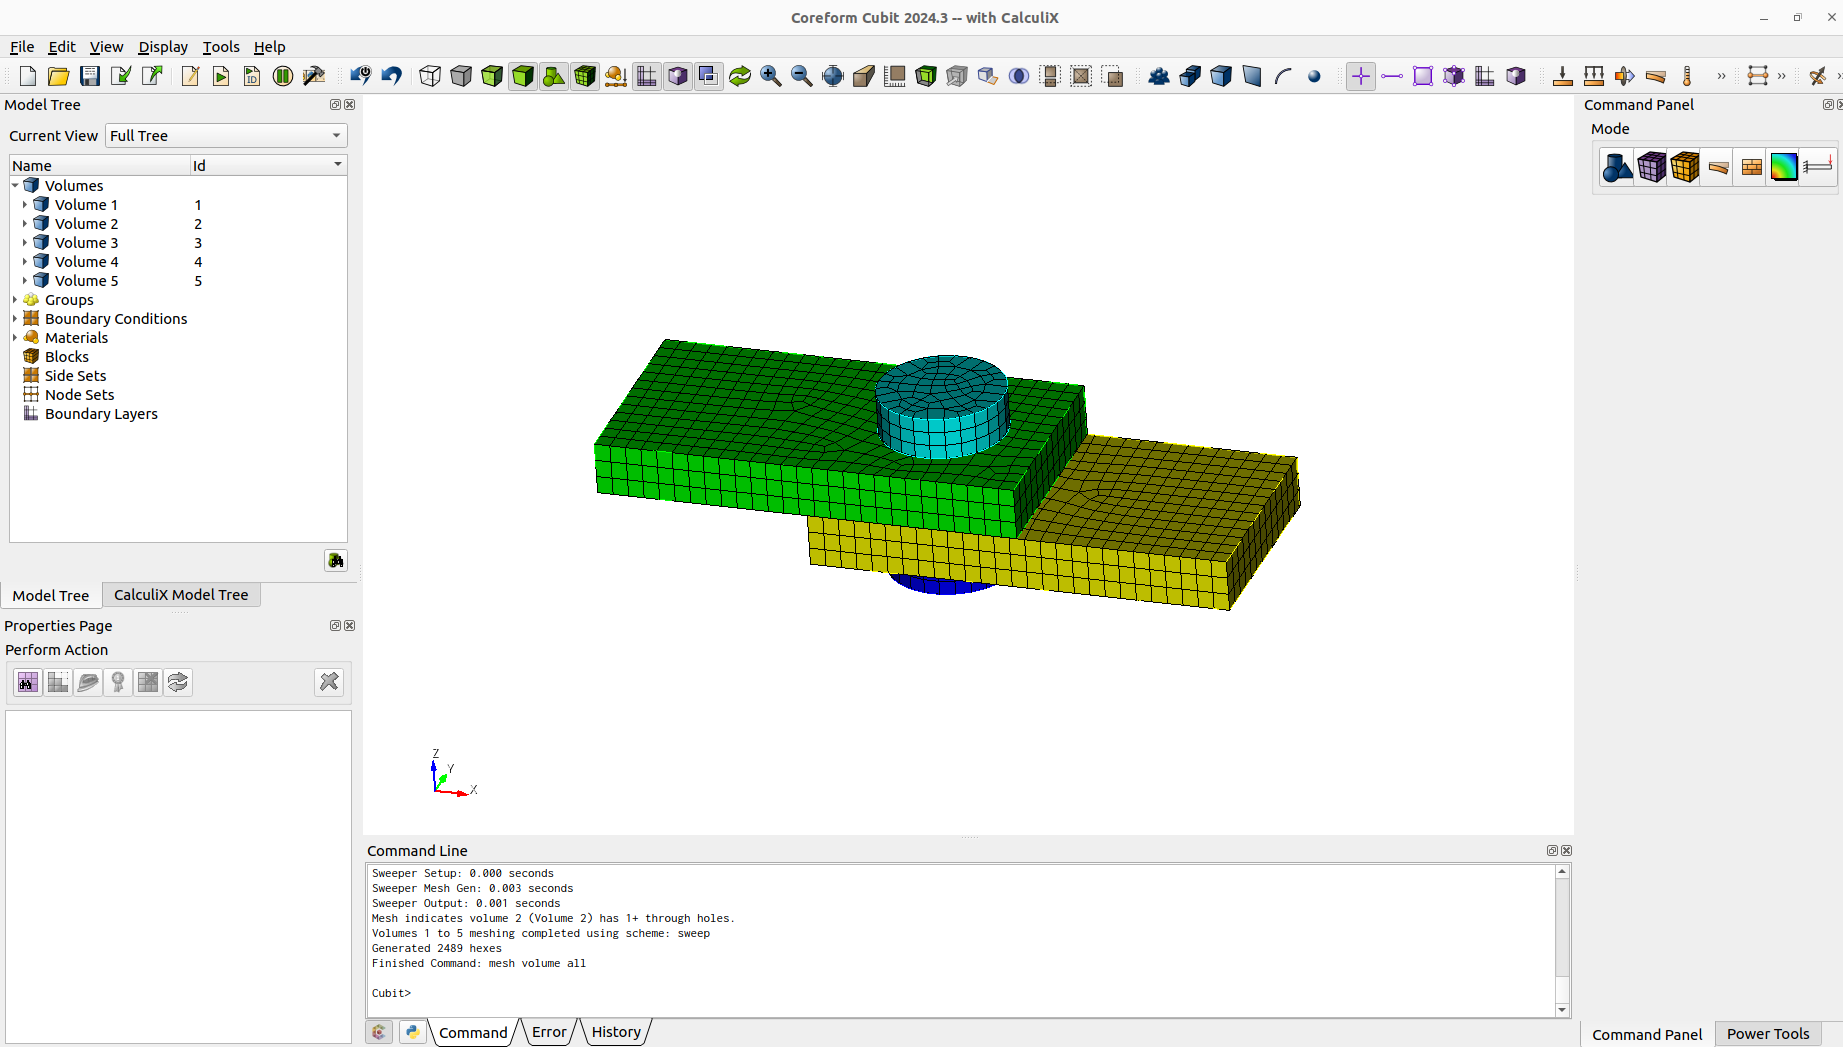
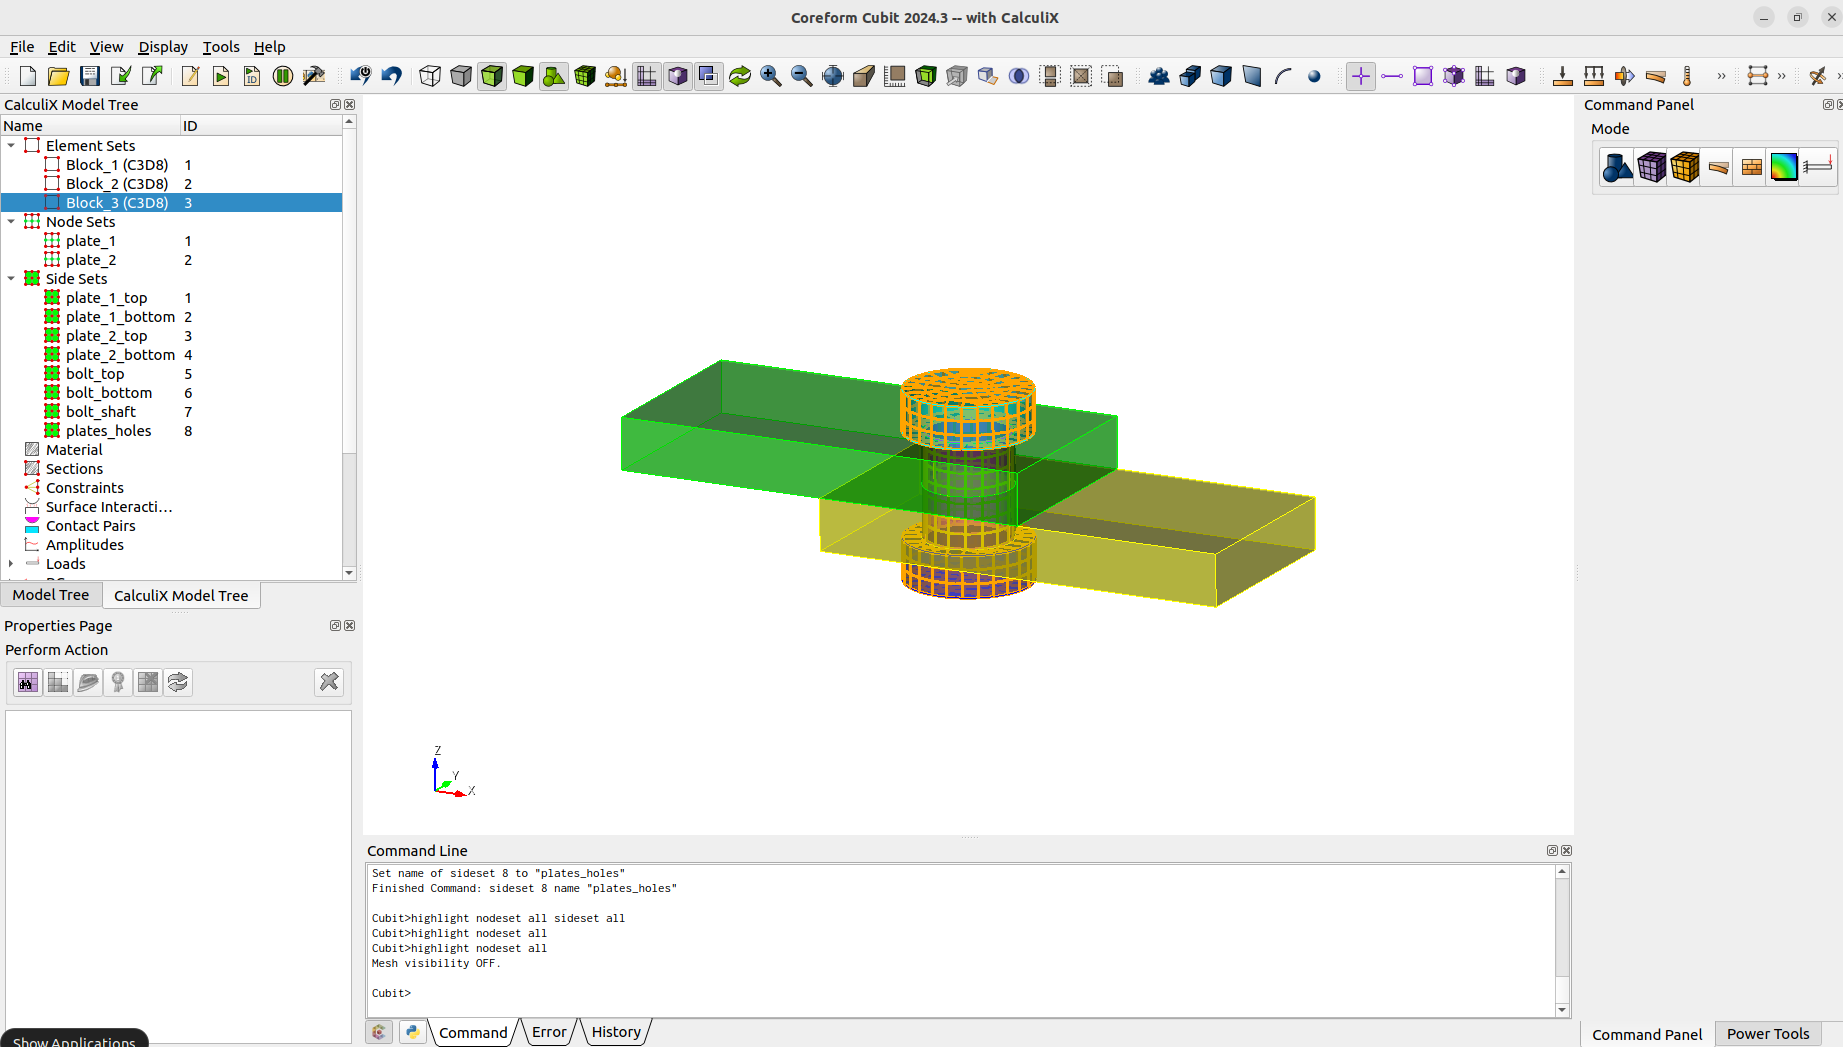
We define the blocks (element sets), nodesets and sidesets that will be needed.
block 1 add vol 1
block 2 add vol 2
block 3 add vol 3 to 5
nodeset 1 add surface 4
nodeset 1 name "plate_1"
nodeset 2 add surface 12
nodeset 2 name "plate_2"
sideset 1 add surface 30
sideset 1 name "plate_1_top"
sideset 2 add surface 31
sideset 2 name "plate_1_bottom"
sideset 3 add surface 33
sideset 3 name "plate_2_top"
sideset 4 add surface 34
sideset 4 name "plate_2_bottom"
sideset 5 add surface 36
sideset 5 name "bolt_top"
sideset 6 add surface 38
sideset 6 name "bolt_bottom"
sideset 7 add surface 25
sideset 7 name "bolt_shaft"
sideset 8 add surface 29 32
sideset 8 name "plates_holes"

We define the material and make a section assignment.

create material "steel" property_group "CalculiX-FEA"
modify material "steel" scalar_properties "CCX_ELASTIC_USE_CARD" 1
modify material "steel" scalar_properties "CCX_ELASTIC_ISO_USE_CARD" 1
modify material "steel" matrix_property "CCX_ELASTIC_ISO_MODULUS_VS_POISSON_VS_TEMPERATURE" 2.1e+5 0.3 0
modify material "steel" scalar_properties "CCX_PLASTIC_ISO_USE_CARD" 1
modify material "steel" scalar_properties "CCX_DENSITY_USE_CARD" 1
modify material "steel" matrix_property "CCX_DENSITY_DENSITY" 7.85e-06 0
modify material "steel" scalar_properties "CCX_EXPANSION_USE_CARD" 1
modify material "steel" scalar_properties "CCX_EXPANSION_ISO_USE_CARD" 1
modify material "steel" matrix_property "CCX_EXPANSION_ISO_A_TEMPERATURE" 1.2e-05 0
modify material "steel" scalar_properties "CCX_PLASTIC_USE_CARD" 1
modify material "steel" matrix_property "CCX_PLASTIC_ISO_YIELD_STRESS_VS_STRAIN_VS_TEMPERATURE" 235 0 0
ccx create section solid block all material 1

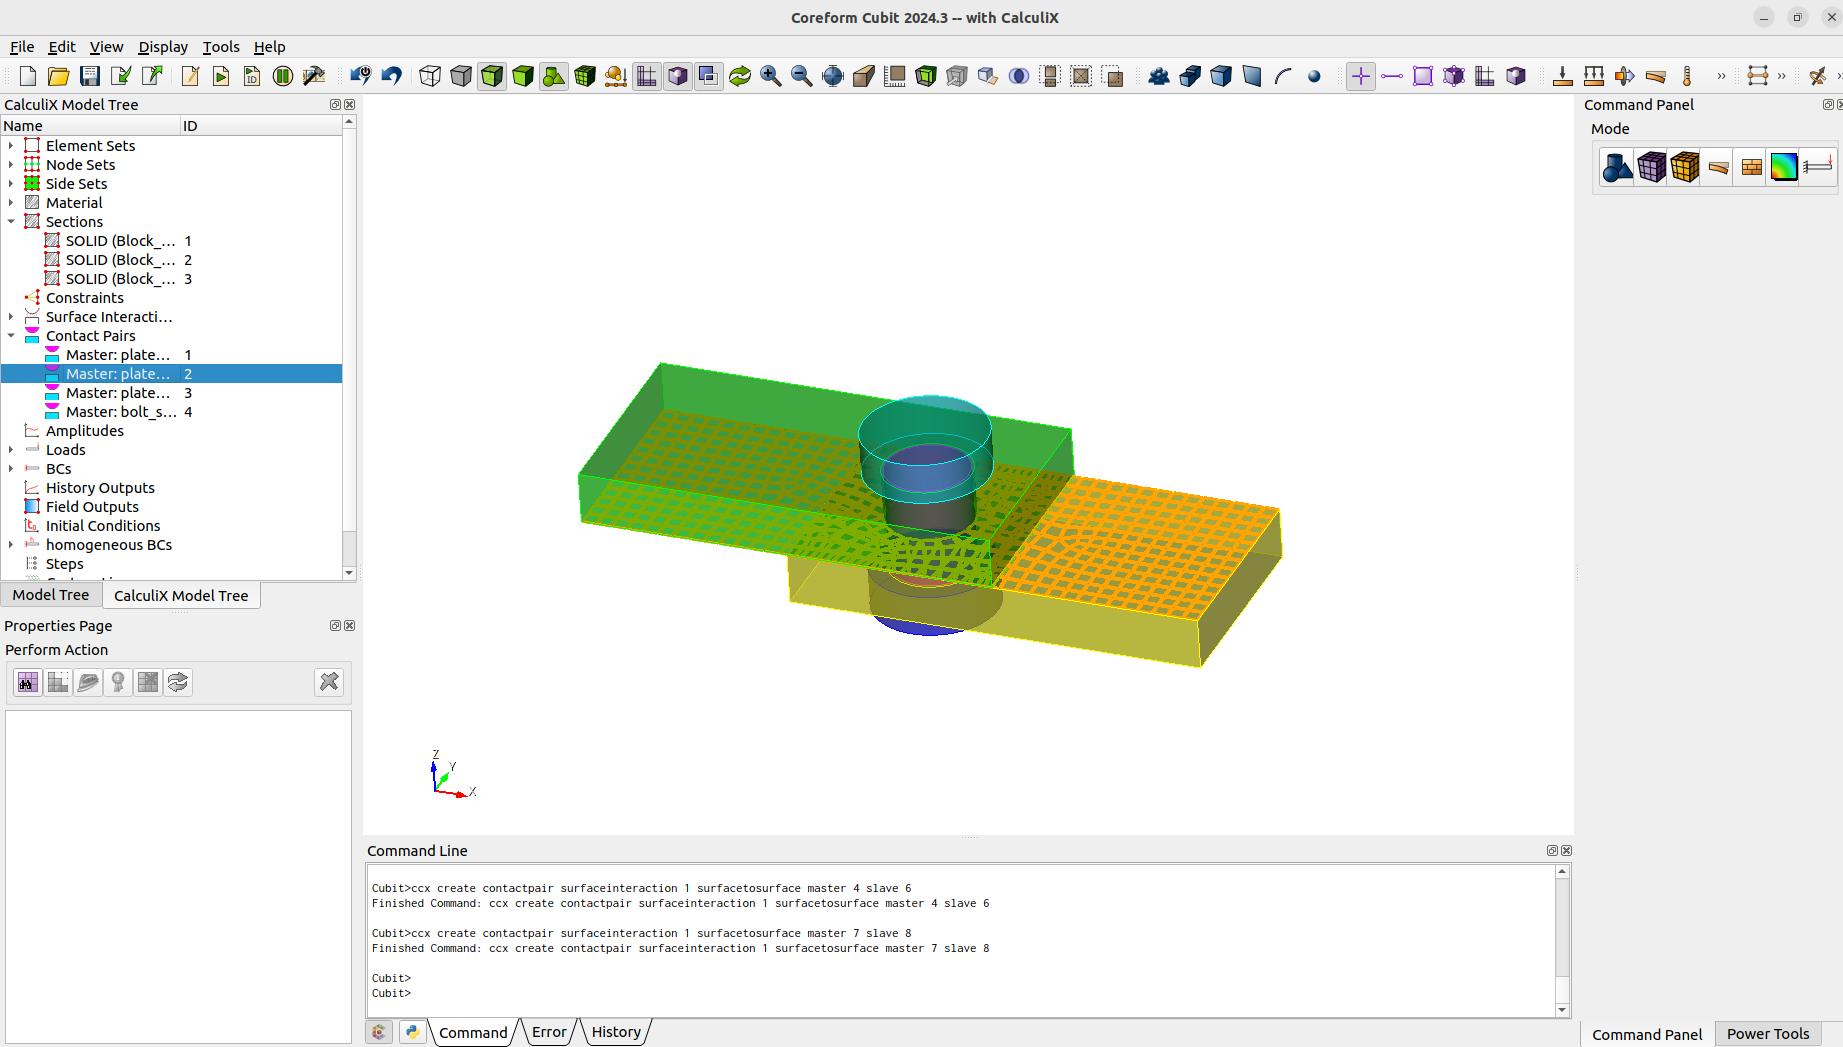
As we want to model a contact problem, we need a surface interaction and contact pairs.

ccx create surfaceinteraction name "interaction" linear slopeK 1e+7 sigmaINF 1 c0 1e-3
ccx modify surfaceinteraction 1 friction mu 0.1 lambda 500
ccx create contactpair surfaceinteraction 1 surfacetosurface master 1 slave 5
ccx create contactpair surfaceinteraction 1 surfacetosurface master 2 slave 3
ccx create contactpair surfaceinteraction 1 surfacetosurface master 4 slave 6
ccx create contactpair surfaceinteraction 1 surfacetosurface master 7 slave 8
One way to define a preload for bolts, is to use the thermal expansion or in this case a shrinking. It is needed to define initialconditions for the temperature and "preload" the bolt with a temperature.
create temperature on volume all value 0
ccx create initialcondition temperature
ccx modify initialcondition 1 temperature bc_id 1
#preload
create temperature on volume 3 value -50
ccx modify temperature 2 keyword_type temp

To initial the contact we first want the plates to be fixed. When contact is achieved we will pull the plates apart. The boundary conditions are as follows.

# plate bc
create displacement name "plate_1_fix" on nodeset 1 dof 1 dof 2 dof 3 fix 0
create displacement name "plate_2_fix" on nodeset 2 dof 1 dof 2 dof 3 fix 0
create displacement name "plate_1_pull" on nodeset 1 dof 1 fix -0.35
create displacement name "plate_2_pull" on nodeset 2 dof 1 fix 0.35
To get some results we need to define the history and field outputs.
ccx create historyoutput name "ho_1" element
ccx modify historyoutput 1 element block 1 totals_yes
ccx modify historyoutput 1 element key_on S E
ccx modify historyoutput 1 element key_off SVF ME PEEQ CEEQ ENER SDV HFL HFLF COORD ELSE ELKE EVOL EMAS EBHE CENT
ccx create historyoutput name "ho_2" element
ccx modify historyoutput 2 element block 2
ccx modify historyoutput 2 element key_on S E
ccx modify historyoutput 2 element key_off SVF ME PEEQ CEEQ ENER SDV HFL HFLF COORD ELSE ELKE EVOL EMAS EBHE CENT
ccx create historyoutput name "ho_3" element
ccx modify historyoutput 3 element block 3
ccx modify historyoutput 3 element key_on S E
ccx modify historyoutput 3 element key_off SVF ME PEEQ CEEQ ENER SDV HFL HFLF COORD ELSE ELKE EVOL EMAS EBHE CENT
ccx create historyoutput name "ho_4" contact
ccx modify historyoutput 4 contact contactpair 1 totals_yes
ccx modify historyoutput 4 contact key_on CDIS CSTR CELS CNUM CF CFN CFS
ccx create historyoutput name "ho_5" node
ccx modify historyoutput 5 node nodeset 1 totals_yes
ccx modify historyoutput 5 node key_on U RF
ccx modify historyoutput 5 node key_off NT TSF TTF PN PSF PTF MACH CP VF DEPF TURB MF RFL
ccx create fieldoutput name "fo_1" node
ccx create fieldoutput name "fo_2" element
ccx create fieldoutput name "fo_3" contact
ccx modify fieldoutput 1 node
ccx modify fieldoutput 1 node key_on RF U NT
ccx modify fieldoutput 1 node key_off CP DEPF DEPT DTF HCRI KEQ MACH MAXU MF PNT POT PRF PS PSF PT PTF PU RFL SEN TS TSF TT TTF TURB V VF
ccx modify fieldoutput 2 element
ccx modify fieldoutput 2 element key_on E S
ccx modify fieldoutput 2 element key_off CEEQ ECD EMFB EMFE ENER ERR HER HFL HFLF MAXE MAXS ME PEEQ PHS SF SMID SNEG SPOS SVF SDV THE ZZS
ccx modify fieldoutput 3 contact
ccx modify fieldoutput 3 contact key_on CDIS CSTR CELS
ccx modify fieldoutput 3 contact key_off PCON

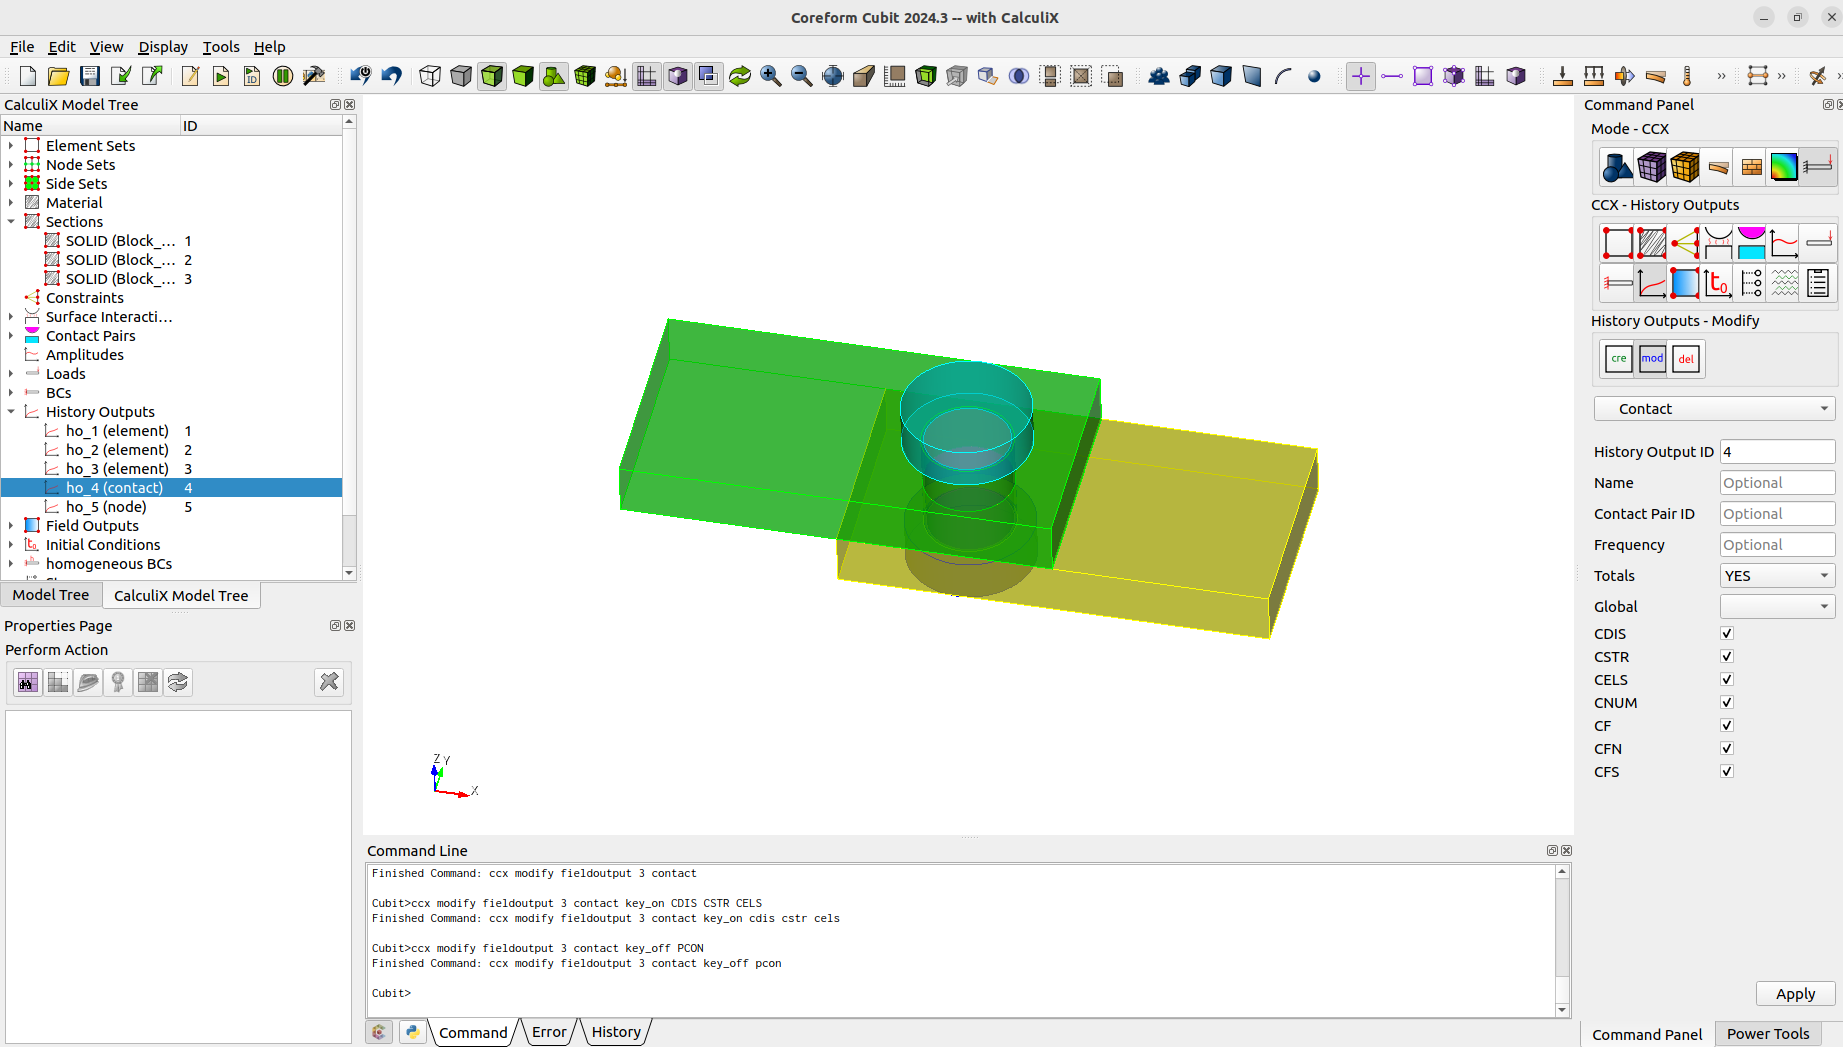
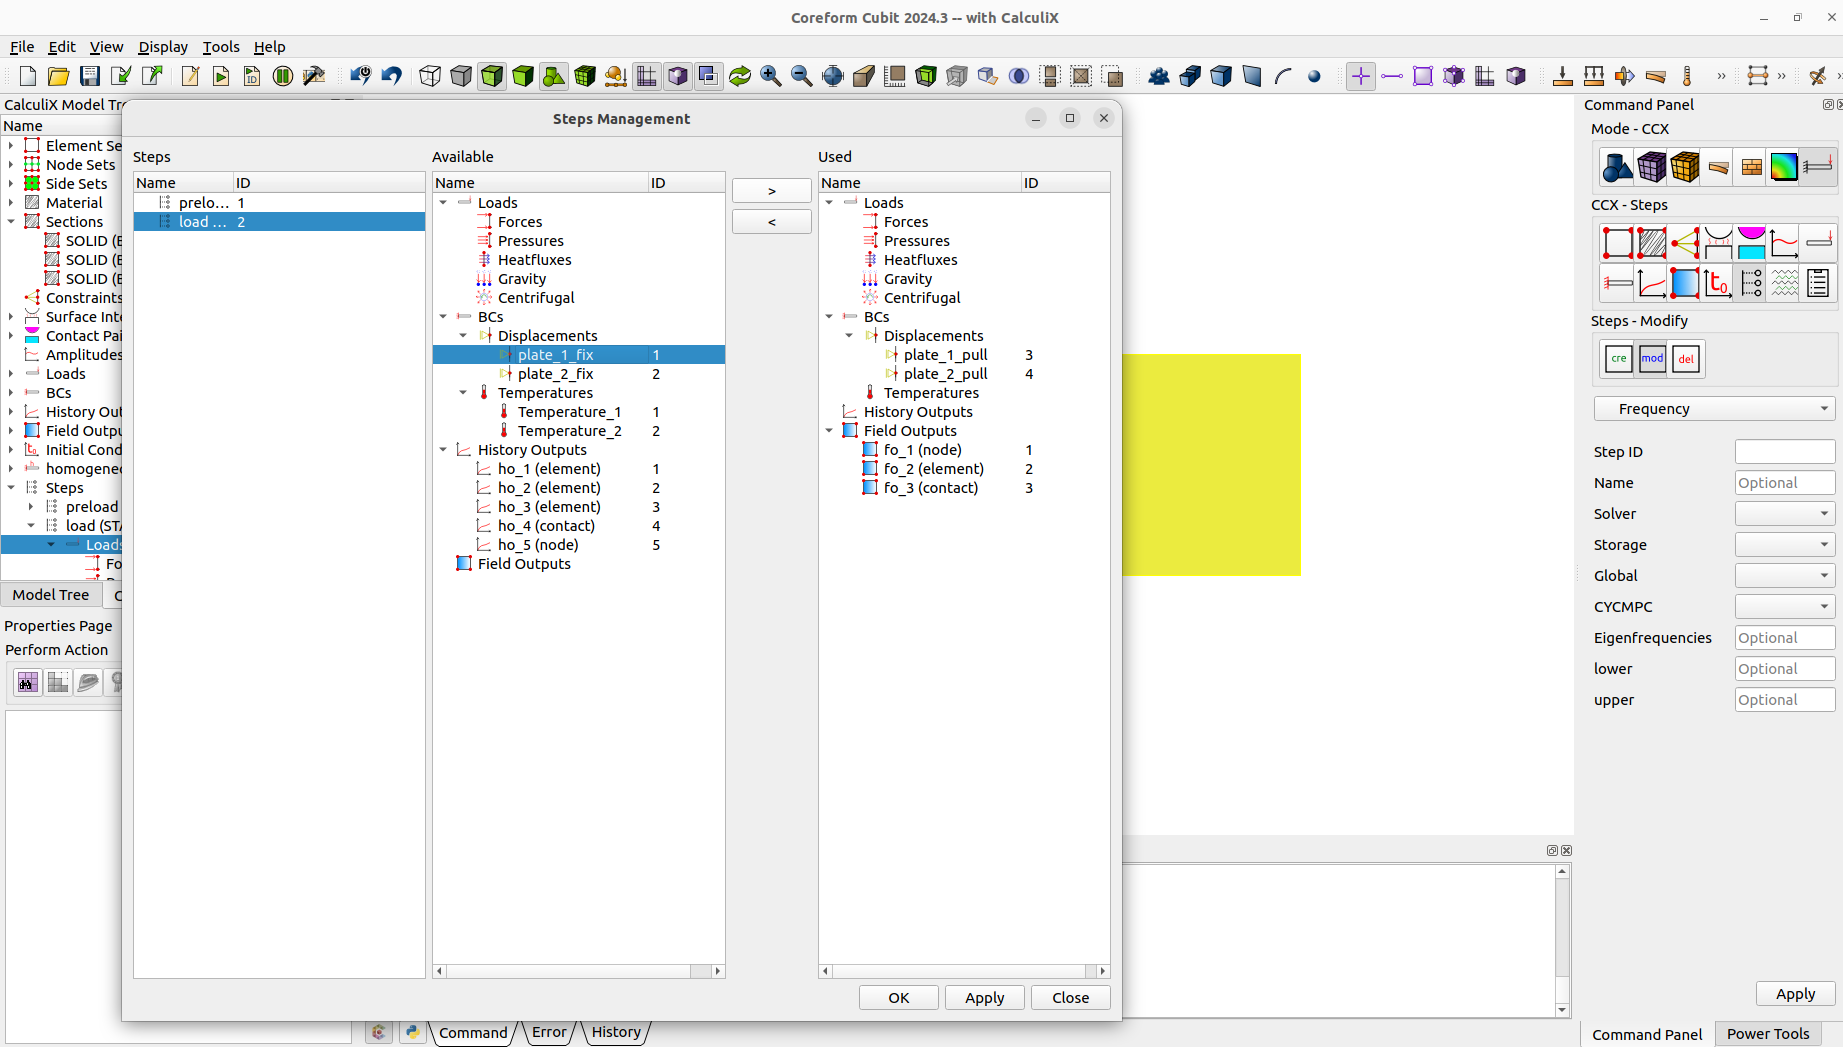
Now we define the two needed steps. First one is to preload the bolt and achieve contact. The second step is for pulling the plates apart. We can easily assign the bc's and outputs to the steps with the steps management.

ccx create step name "preload" static
ccx modify step 1 parameter nlgeom_yes
ccx modify step 1 static totaltimeatstart 0 initialtimeincrement 0.5 timeperiodofstep 1 minimumtimeincrement 1e-5 maximumtimeincrement 0.5
ccx step 1 add fieldoutput 1 2 3
ccx step 1 add historyoutput 1 2 3 4 5
ccx step 1 add bc temperature 2
ccx step 1 add bc displacement 1 2
ccx create step name "load" static
ccx modify step 2 parameter nlgeom_yes
ccx modify step 2 static totaltimeatstart 1 initialtimeincrement 0.01 timeperiodofstep 1 minimumtimeincrement 1e-5 maximumtimeincrement 0.02
ccx step 2 add fieldoutput 1 2 3
ccx step 1 add historyoutput 1 2 3 4 5
ccx step 2 add bc displacement 3 4
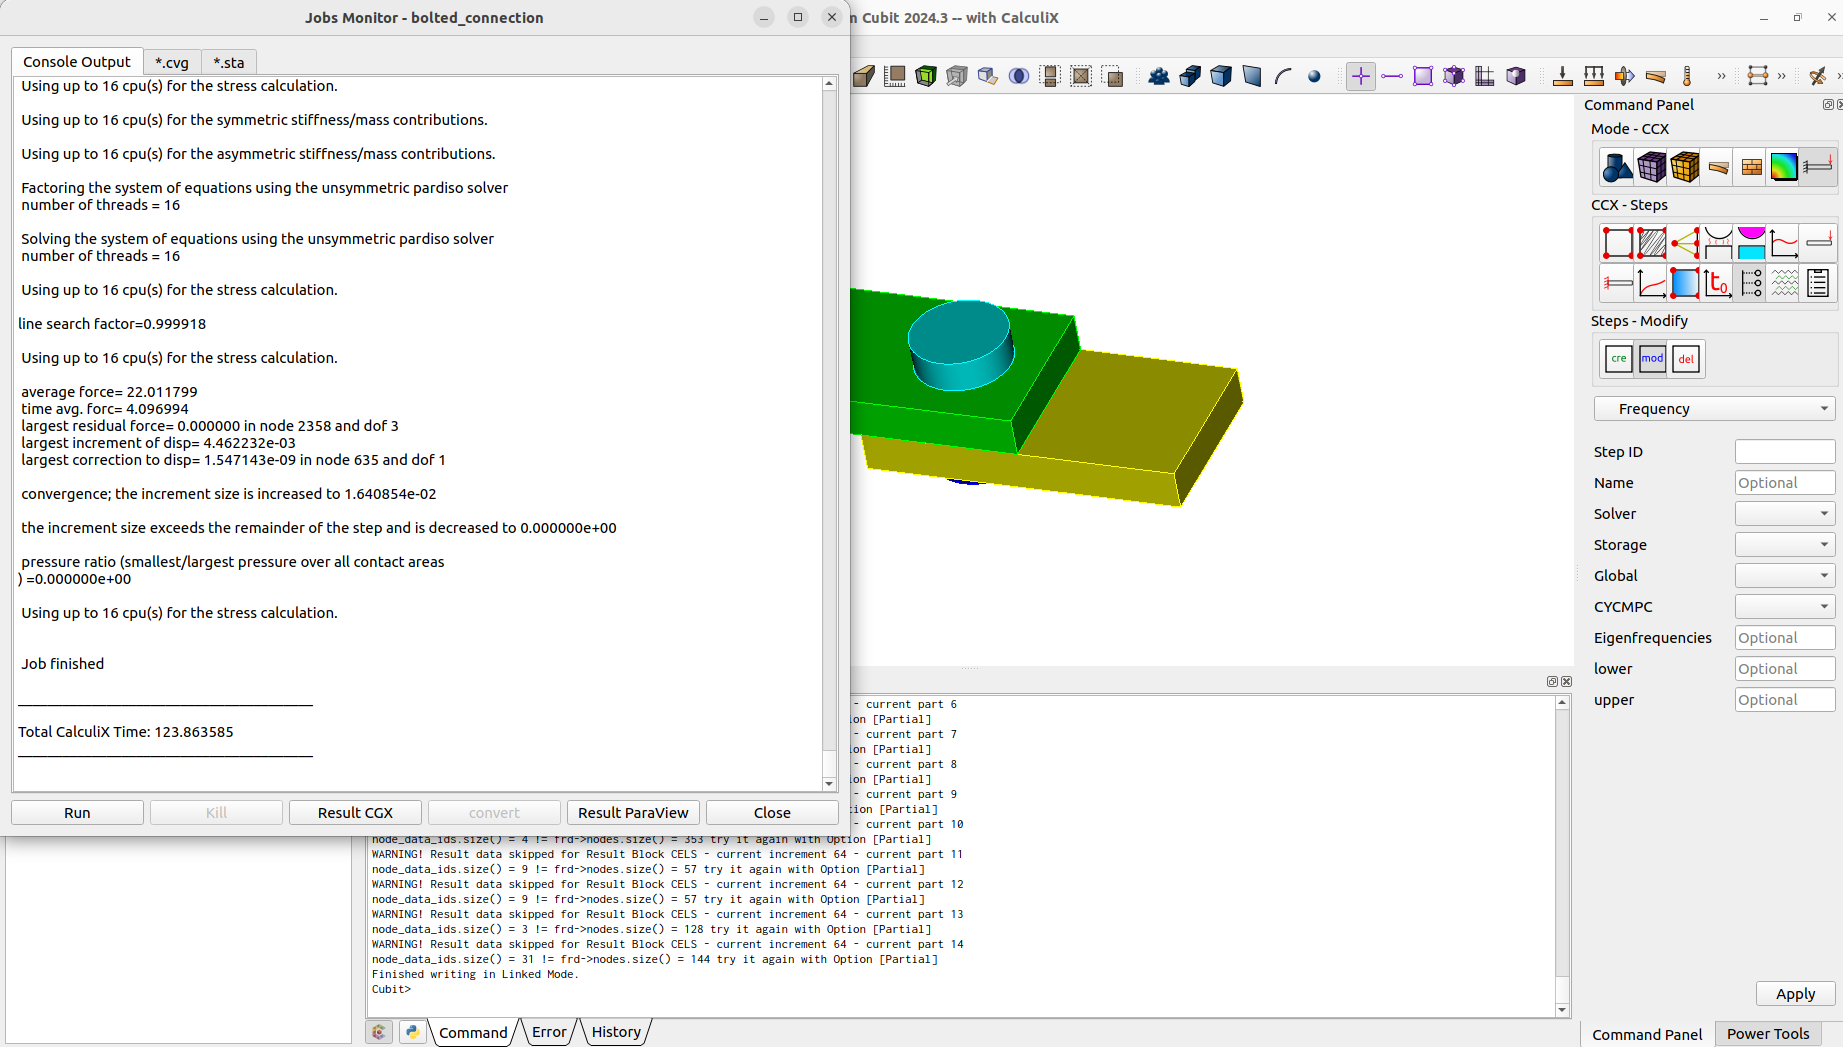
Last thing is to create a job and then we can already run CalculiX.
ccx create job name "bolted_connection"
ccx run job 1

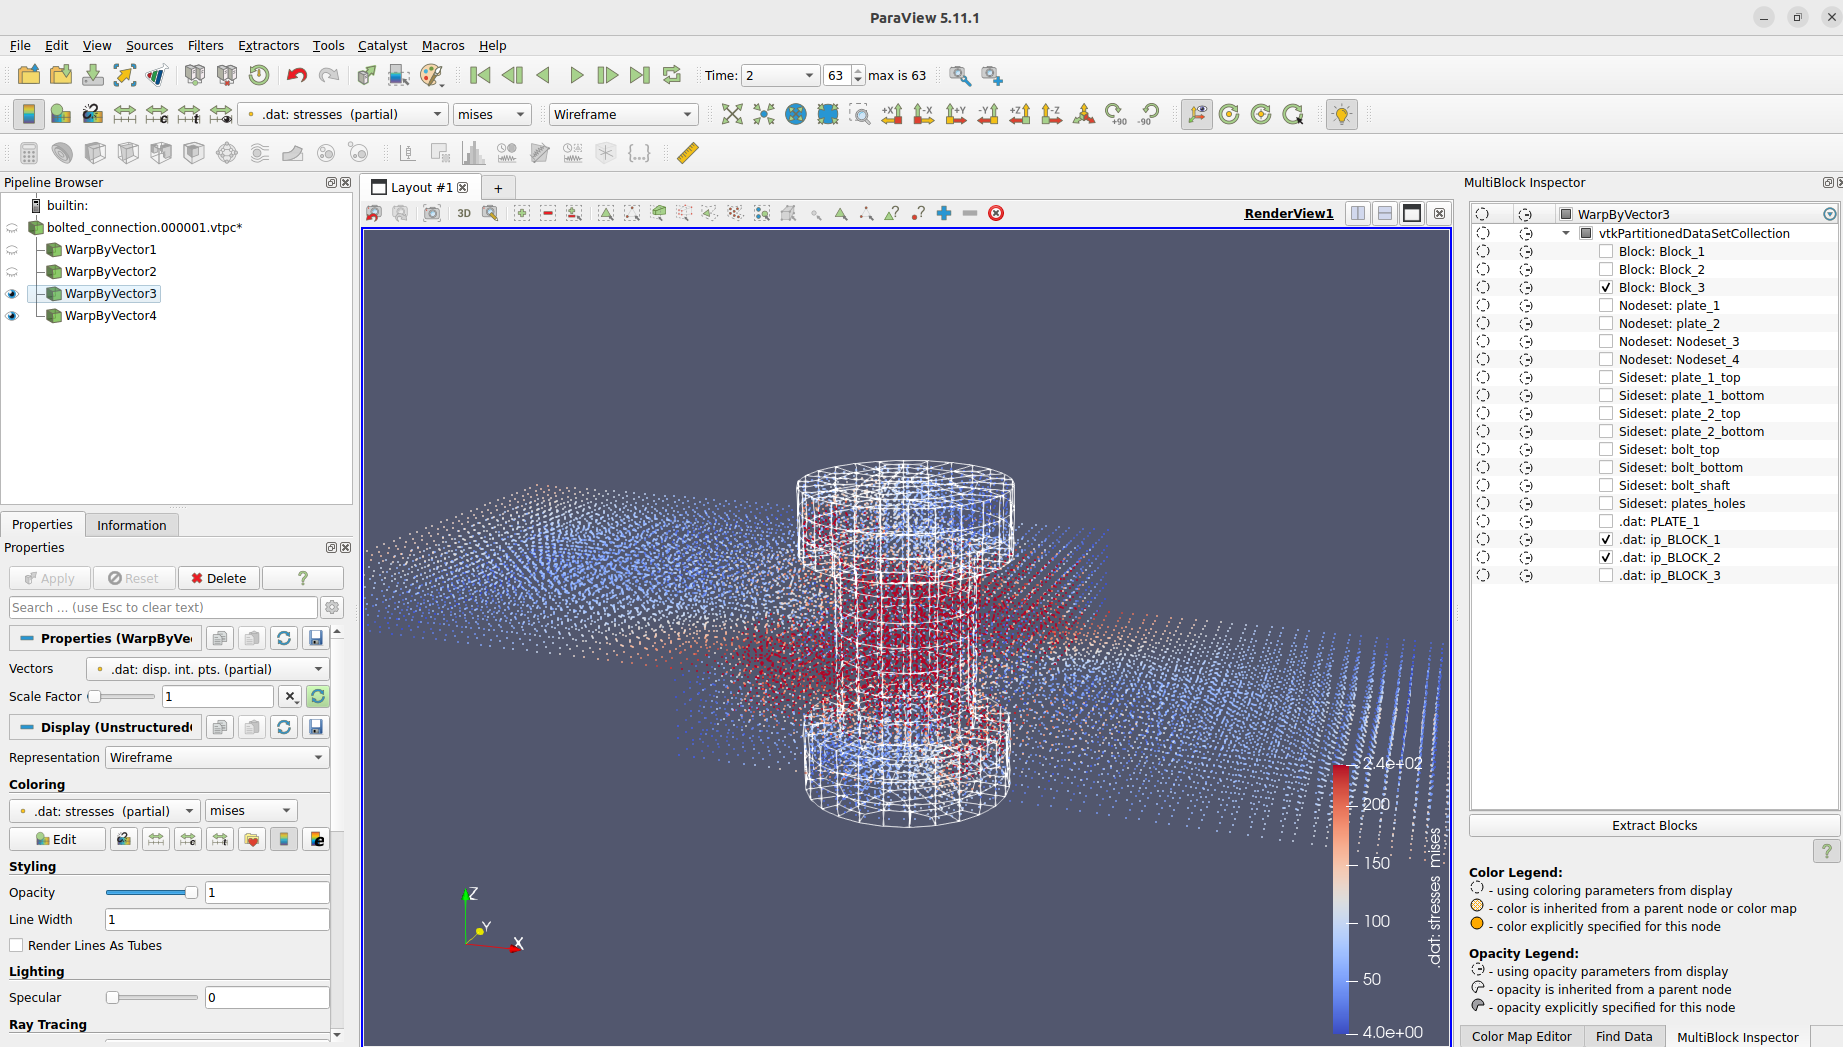
When we view the results with paraview. We will notice that some results from CalculiX were skipped in the conversion.

This is because we used a contact output. In the .frd file, contact outputs will only be written for elements in contact. This means that not for every node a result will exists. Inconsistend results over the iterations will cause problems, so they will be skipped when writing the data for paraview.
To view the skipped results we will manually convert the results with the partial option. This way missing nodal results will be filled and marked and we can view the missing CalculiX results now in paraview.
ccx result convert job 1 partial
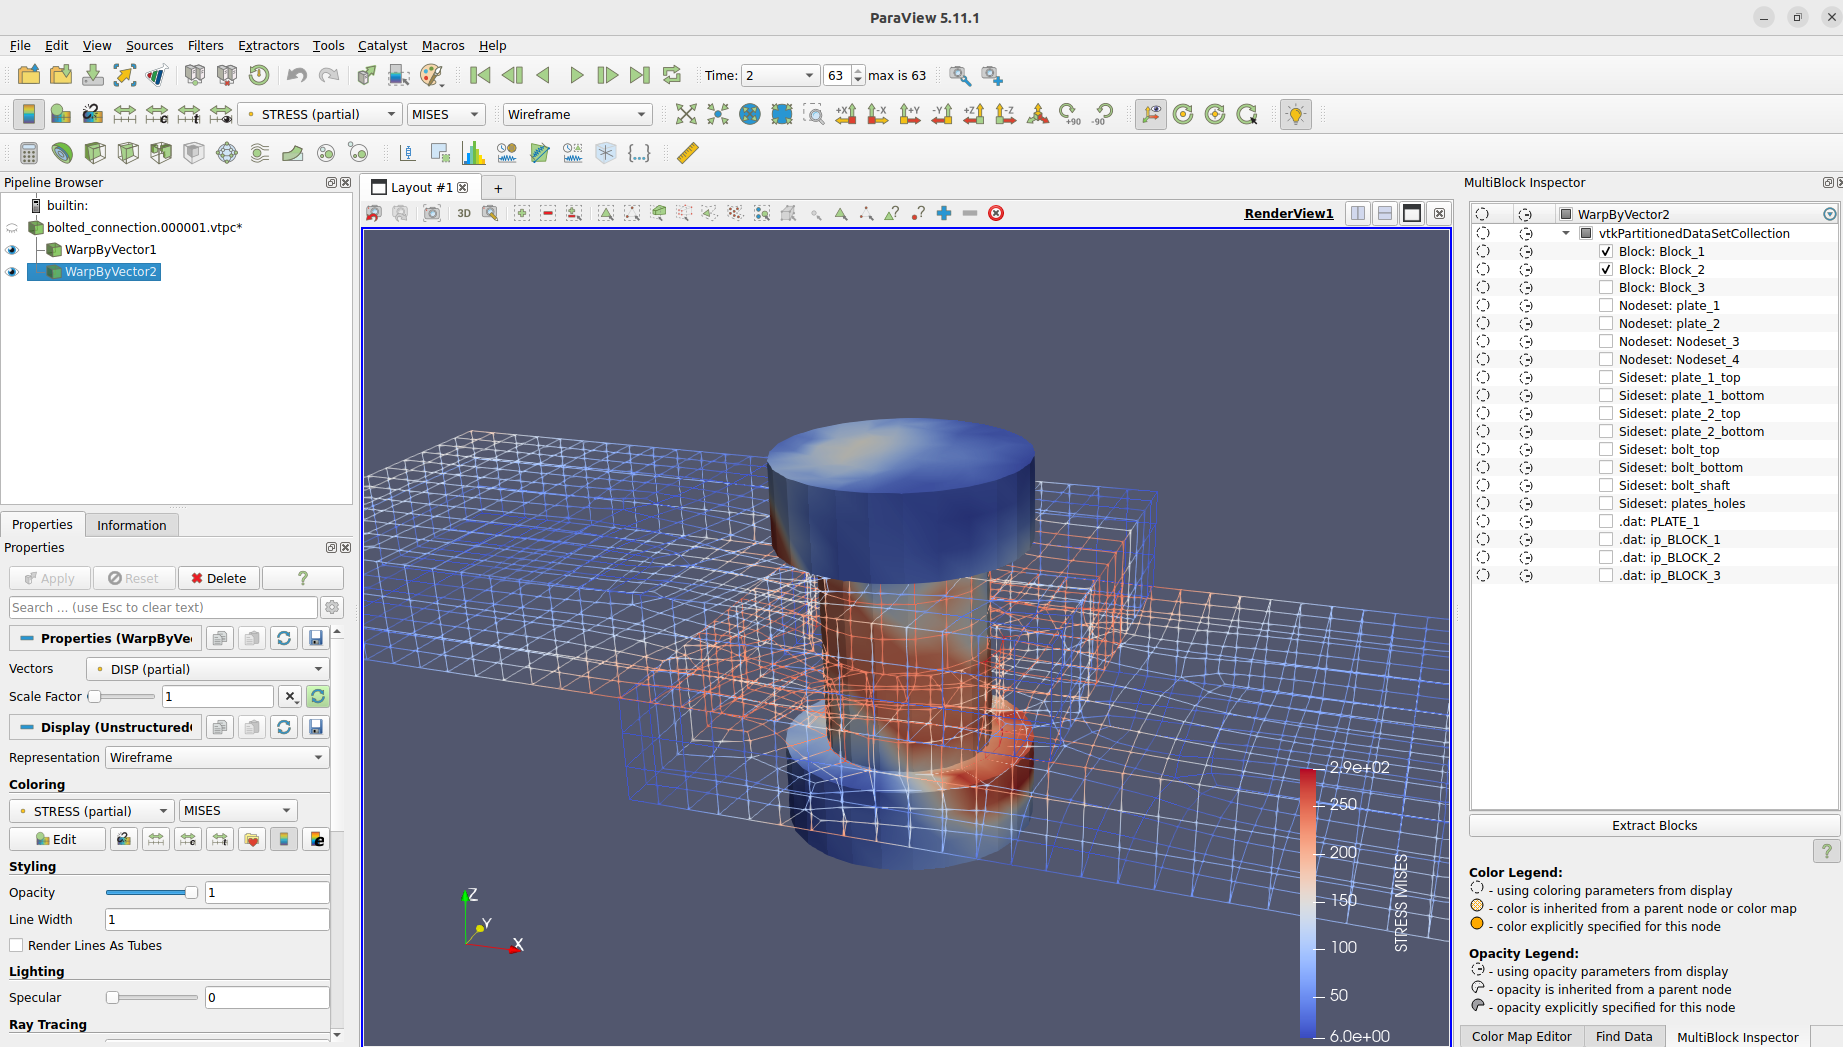
We can even take a look at the integration point results from CalculiX.
Zum Seitenanfang